

Learn about the GrabCAD Platform
Get to know GrabCAD as an open software platform for Additive Manufacturing
Visit our new homepage


I may be a little biased with these two tutorials since I created them, but please post links to additional (good) Keyshot tutorials.
I preface it with "good", because there are a lot of bad tutorials available. I'd like to try and keep this on good tutorials, rather than filling it up with any tutorial.

Above is s my first Keyshot tutorial. It documents the process I used to render a paintbrush. It goes a bit into the Material Graph. and a little Photoshop.
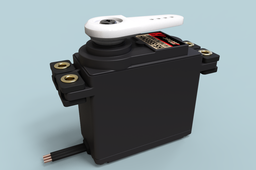
Below is my second Keyshot tutorial. It documents the rendering of a small servo with a decal.

Hi Fred, Thanks for all the suggestions above!
I’m using KeyShot for last few months. And seems like I know just 1% of things which I can do in it. I’m a passion person but great renderings and realistic pictures seems hard and unreachable for me at the moment. I'm aslo following Will and he is amazing profesional but then again it seems like something impossible.
So Where do I start? Or maybe I just don't put enough time in this.
Cheers.
(Sample of my last proper render)

Eugen,
Everyone starts somewhere. The important thing is that you have started, now stick with it, and I think you'll see improvements over time. Below are some areas that I'd modify in the rendering example. Please don't take these to mean the rendering is bad. I'm no pro either. These are just things I would do differently.
Mainly I'd use the photos as a reference for interesting camera angles, but they can also be great for ideas on texture and materials. The images below show a bit of a bead blast finish on the USB tip. Soft rubber on the body. And a very light brushed finish on the rotating part.
Also, don't forget that some work can be done later in a photo editor. I try to limit that to a little sharpening of details, and darkening of shadows (as I tried to show in my tutorials above), but if you are a photo editing master, the sky is the limit.


I made a few changes to the mode, but nothing to drastic. Mostly some fillets. I also added a little seam along the USB tip, and a bit of a gap between the body and the USB tip.

I think some scratches from insertion would be interesting, but they were not coming out well in my first attempts.

If you don't receive the email within an hour (and you've checked your Spam folder), email us as confirmation@grabcad.com.
