

35Tutorials'''' KeyShot tips(Step By Step)"''

How to Create Object VR’s with KeyShotVR
-
Step 1:
...

-
Step 2:
Creating a KeyShotVR
After you purchase the KeyShotVR add-on, you’ll have an additional button in the KeyShot menu. Selecting KeyShotVR will bring up a wizard that takes you through all the steps necessary to create the visuals and embed code.

-
Step 3:
1. Pick your VR Mode
You have four options: Turntable, Spherical, Hemisperical or Custom. You’ll see a preview of each one as you select it.

-
Step 4:
2. Pick your VR Center
You have three options here: Environment, Object or Custom. If you select Custom, you’ll be able to select the object, to locate your center around, from the hierarchical list of models in your scene.

-
Step 5:
3. Pick Intial VR View
This is the first frame of your KeyShotVR. Fine tune the Distance, Azimuth, Inclination and Perspective with an option to show a grid dividing the screen in thirds to help compose the image.

-
Step 6:
4. Set VR Smoothness
This allows you to see the smoothness of the VR independent of both Vertical and Horizontal frames. The number of frames will be the multiple of vertical and horizontal frames, so with 20 Horizontal and 10 Vertical, you will render 200 frames.

-
Step 7:
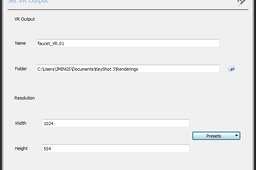
5. Set VR Output
The final step before Rendering is to select your output. Supply a name and location or use the defaults provided. From this screen, you’ll have access to start the rendering or go to the Render Settings for further options–options for play button, level of detail, mouse sensitivity and more. The VR Render options are always available from the Render Settings menu under Output.

-
Step 8:
You’ll notice that it’s also touch-enabled, so you have an interactive viewing experience on mobile device or tablet.
