

Create Revit RFA element from 3D objects

Create Revit RFA element from 3D objects. * Using Autodesk Inventor *
If you have a 3D model file from various programs, you can import into Autodesk Inventor and convert them into REVIT RFA file type elements.
You will then be able to load those into your Revit project and use.
-
Step 1: Environments Tab
Select "Environments" tab

-
Step 2: BIM Content
Select "BIN CONTENT" button

-
Step 3: Export Building Components
Select "Export Building Components" button

-
Step 4: Substitute
You will be prompted to SHRINKWRAP the model for simplification, creating a SUBSTITUTE

-
Step 5: Substitute Dialog
You will have an opportunity to specify specific setting, if you wish

-
Step 6: Name output file
Type in a name for the RFA file you are going to create, or accept accept the default

-
Step 7: Splash screen
While the TRANSLATION is working, you will see the progress screen

-
Step 8: RFA complete (report)
After the conversion is complete, Inventor will display a dialog that the operation was completed.
There is an option to open the TRANSLATION REPORT.
You can choose to open or not.

-
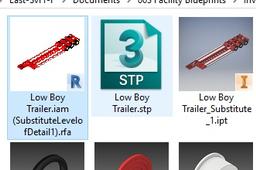
Step 9: Find RFA file and move
Look for the RFA file that was created in the folder location you specified earlier.
RECOMENDATION:
Once you have the RFA, move it to your Revit project folder location for future use and ease of loading into your Revit projects

-
Step 10: Load into Revit
Once you have found the RFA you created, the best practice it to place it in your file structure with the rest of your Revit model files.
Then you can select it to load it into your Revit Project

-
Step 11: Place in Revit Project
Once you have loaded the RFA into your project, you can then place the component where you want.

