

Getting started with a CAR design in Solidworks


Designing a car in Solidworks is a mammoth task and requires lot of time and devotion. It may take marathon hours to finish a car design based on the skill level you are. But whichever level you are there are few things which remain common in designing. This article focuses on getting started with car design in Solidworks.
These are the things needed to know before you get started and create your own.
-
Step 1:
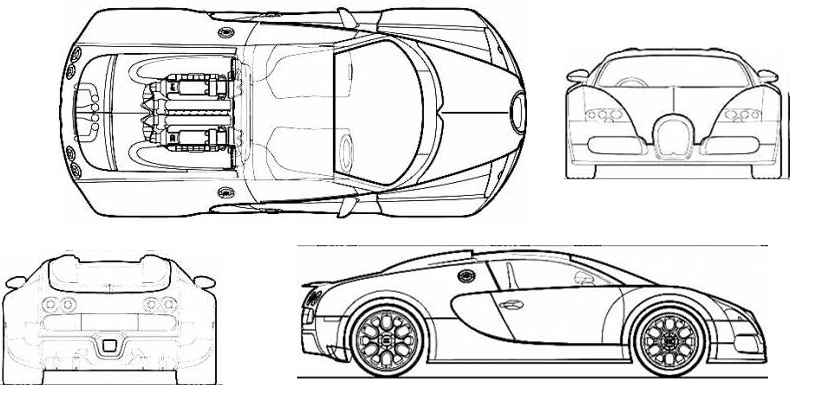
After deciding on from which car you going to start, you must collect ample amount of blueprints or sketches based on which you can work out your design. A blueprint must have at least 3 views of the car i.e. Top, Front, Side and back if possible. There are many websites where you can find such good quality blueprints and use them for personal use. Well you may not be able to use it for professional use depends on the licensing as it needs to be respected.
Here is a sample blueprints downloaded from a free source over the internet which is the-blueprints.com.

-
Step 2:
After starting the design, there will be some positions where you will get stuck and will not be able to move, for that time you need to collect ample of pictures and 3D-Views. Many car company websites offer a sneak peak into their masterpieces which you can use as inspiration for your models.
-
Step 3:
This is the most important part of your design process. As you need to set the blueprints properly. In order to set the blueprint first the whole blueprints should be cut into different views such as Top, Left, Right, Back using any Image editing tool such as MS Paint.
The views should be separated with ample care as all of the views should be of same size. Once you have separated all the views you are ready to put them together in Solidworks.
-
Step 4:
In order to put the Pictures in Solidworks, we will use Sketch Picture Command.
Align the picture at origin and similarly arrange other 3 views in different sketches.
-
Step 5:
Basic tools
Once the alignment is done, you must know about these basic tools needed to get your design through.
• Project Curve
The project curve option is the most used in the designing process. Project curve command can be found in the Features tab. This features projects the curve to a surface curved or plane. It is very useful to create surfaces.
• Boundary Surface
This tool is used to create surfaces after you are done creating curves. This command can be found in Surfaces tab.
• Filled Surface
This is similar to Boundary surface except that it needs a closed curve instead of open ones which are permitted in Boundary surface commands. Filled Surface gives you more control over the surface formed. This command can be found in Surfaces tab.• Split Line
This command is used to split a surface into various pieces by a curve. The curve is projected onto the surface and it is split. This command is used to extract edges from the surfaces.
• Offset Surface
This command creates an offset surface at a distance from the surface selected. You may use this command to create multiple copies of your surface at zero distance or to trim an entity.
• Trim
This commands cuts/trims the surface in to two with the help of trim surfaces.
• Knit
When your model is done you can use this command to knit several pieces together to make one and solidify the model.
-
Step 6:
A feature tree is diagram which shows all the elements of model in a hierarchical manner. It is very important to keep it organized while making big models and drawings as it increases your productivity, avoid confusions and accidental deletions. Here are a few tips to keep it organized:
• Rename the elements and give them names by which you can identify.
E.g. – Top View, Front fender sketch.
• Club similar elements into folders.
e.g. – Front Fender, Windscreen.
You can keep a bunch of elements into a similar folder so that it’s easier to get back to it rather click each element and seeing what it is!!
• Use Comments and annotations
This becomes important when you are working in a team. It enables sharing in an efficient manner.
