

How to Create Solidworks Planes


A tutorial showing how to make planes in Solidworks.
Why do you need to understand plane creation? You’ll find that 90% of the time sketches can be created by simply starting a new sketch and selecting the part’s face that you wish to sketch on. However, what happens when you need to create a feature that is not perpendicular to any surface on your part? You need to create a plane. So here's some ways you can do it.
-
Step 1: Overview
Planes are defined by selecting up to three references. You can select a vertex, a point, an edge, or a face. They are controlled with geometric constraints much like you would control dimensions on a blueprint. Planes can also be offset a set distance or rotated a specified amount relative to your selection.
Get started by going to your features tab. Click the “Reference Geometry” drop down arrow and select “Plane”

Your plane creation manager will show up on the left side. This shows the references as you select them and the controls that you can manipulate the plane with will also show up there.

-
Step 2: Single Reference Selections
A single face selection creates a plane parallel and coincident with the selected surface. On its own this is rarely better that creating a sketch on a plane like normal.
It can also be offset from the selected plane. Again, limited uses but sometimes comes in handy.

Notice that when you selected the face the message on the left side changed from “Select references and constraints” to “Fully defined”. Here is a rule that must always apply when creating planes, same as with sketches: A plane must be fully defined.


You can create planes and pattern them to be offset by a linear amount.

-
Step 3: Dual Reference Selections
You can select a vertex (pink dot left side) and an edge (purple vertical line right side). The two references will be coincident.

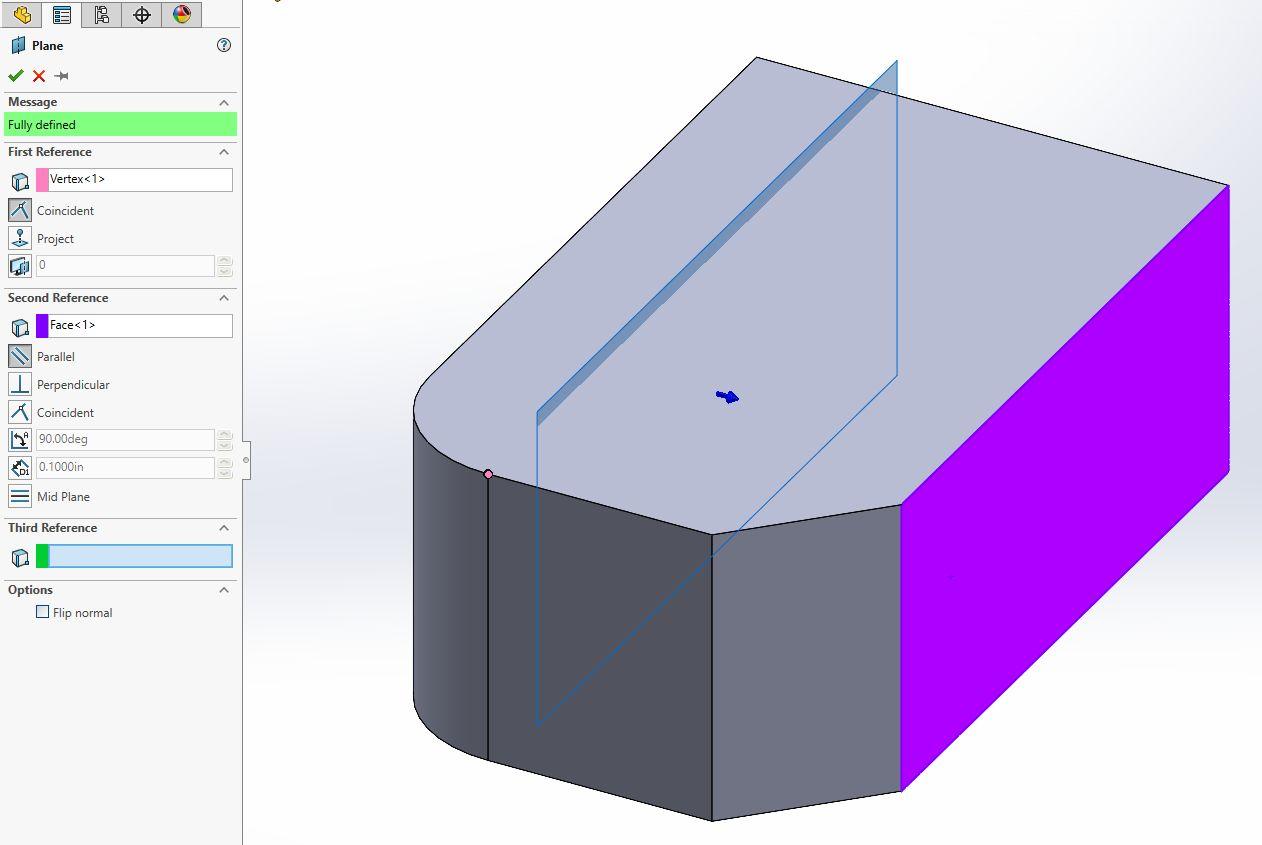
You can select a vertex (pink dot left side) and a face (purple surface). The plane will be parallel with the face and the depth will be coincident with the vertex.
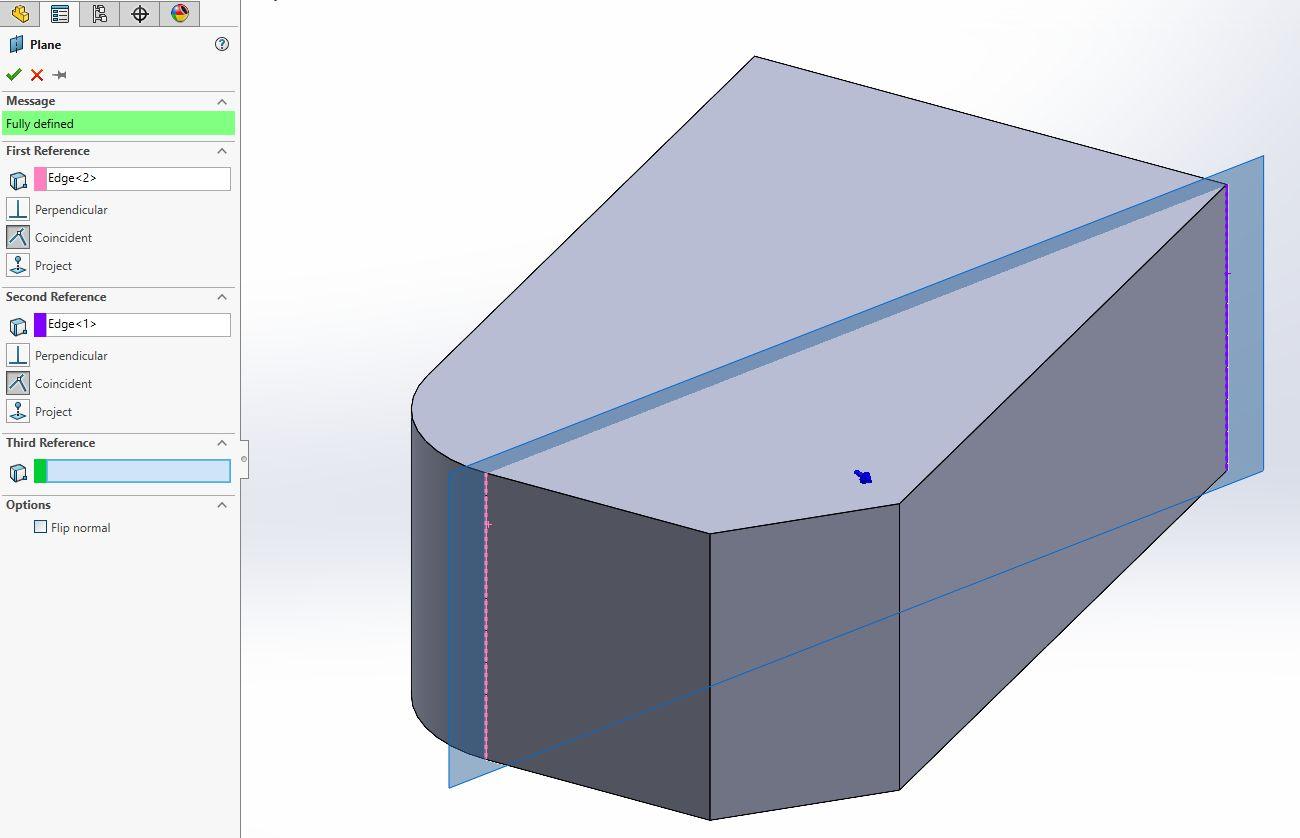
You can select an edge (pink vertical line left side) and an edge (purple vertical line right side).
You can select a face (pink surface) and a face (purple surface). This will put the plane symmetrically between the two faces. You can also do this between two parallel faces to get the mid-plane.

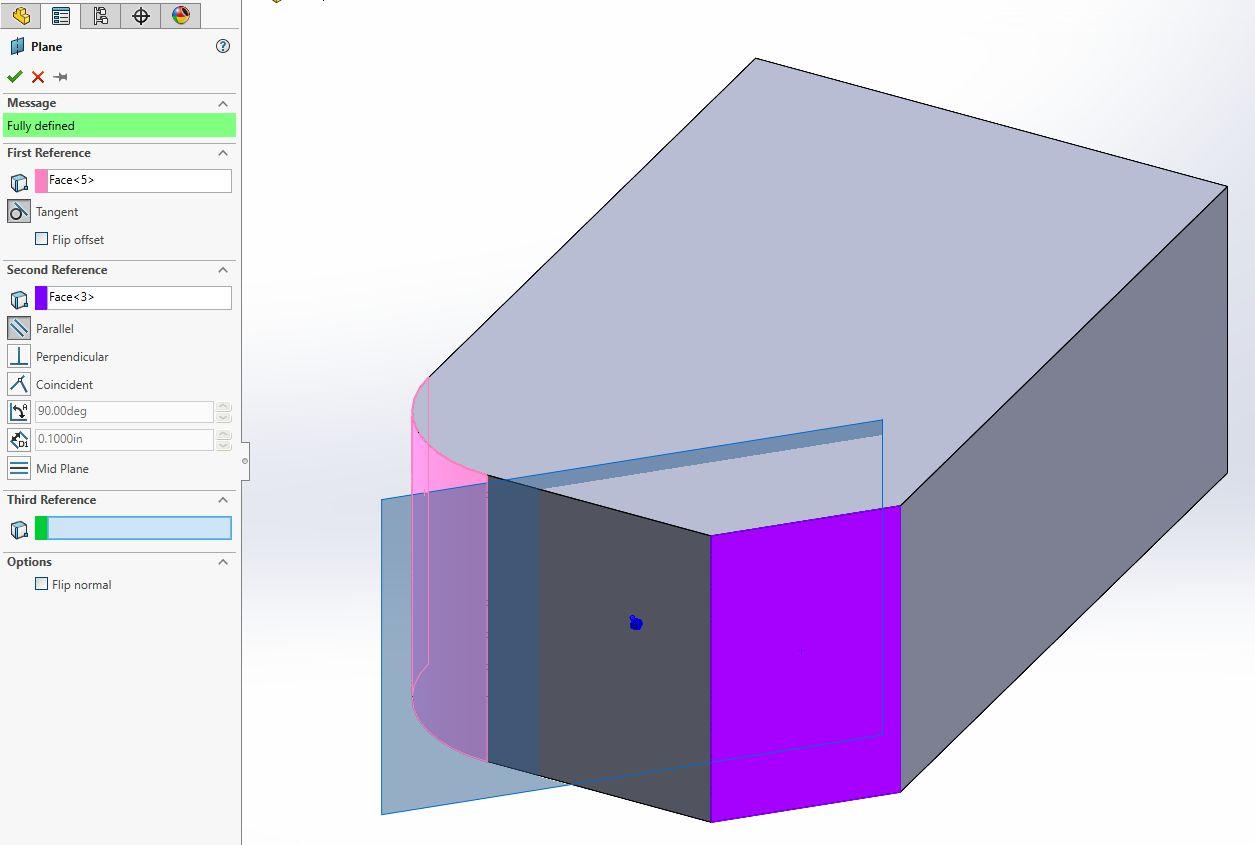
You can select a curved face (pink surface) and a face (purple surface). This will create the plane tangent to the curve and perpendicular to the second face.

You can also make the second face parallel.
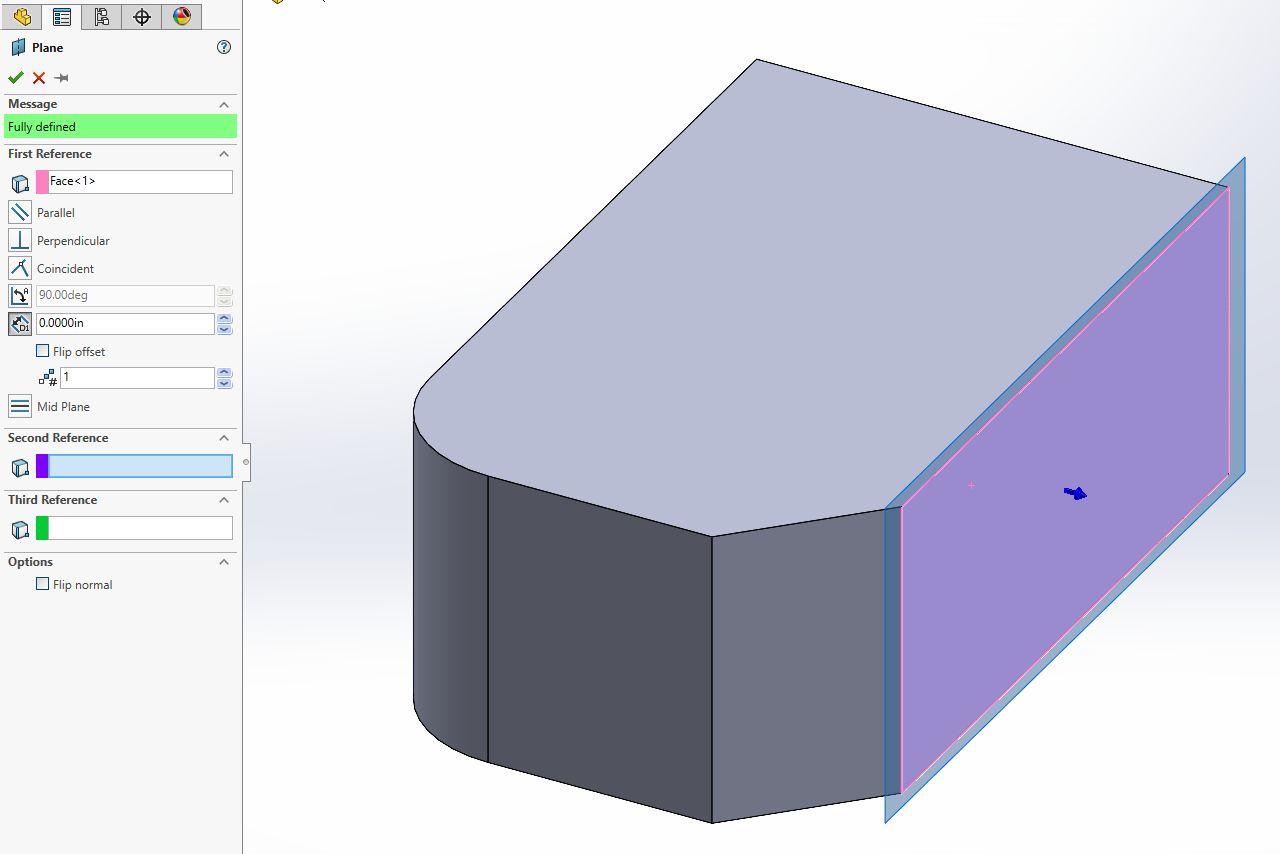
You can select a face (pink surface) and an edge (purple vertical line right side). This creates a plane perpendicular to the face and coincident with the edge.

You can select a face (pink surface) and an edge (purple line bottom right of part) and create rotate the plane a chosen angle off the face. The plane with be coincident with the edge.

By increasing the number of planes to create you can continue to create planes that are rotated by the specified angle relative to each other.

You can select a point (pink dot) and an edge (purple vertical line right side). The key difference between a point and a vertex, a point can be the midpoint of a line!

-
Step 4: Three Point Reference Selection
You can select a vertex (pink dot) and a vertex (purple dot) and a vertex (green dot).

-
Step 5: Keep Playing Around!!!
I guarantee you this is not all the ways you can create a plane. There are dozens more combinations just waiting to be discovered. Feel free to share other ways you’ve found to create a plane below!
