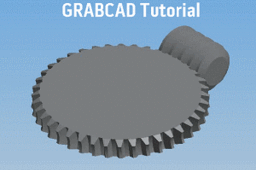
How to make Worm Gear and its Dynamic Simulation or Animation in Autodesk Inventor?

First run Autodesk Inventor.
-
Step 1:
Then click
New>Assembly
-
Step 2:
Then save it to your working directory.

-
Step 3:
.

-
Step 4:
Now in Design menu, click Worm Gear

-
Step 5:
Following display menu will appear.Enter all the values shown here.

-
Step 6:
.

-
Step 7:
Re-orient your model to isometric view shown below.

-
Step 8:
Right click on "Worm Gear" of side menu and turn on "Flexible" mode.

-
Step 9:
Now click
Assemble>Constrain
-
Step 10:
Following display menu will appear. In place constraint menu you can see the
"Selection" 1 is active.Select "X Axis" as highlighted with green box in the following
figure.

-
Step 11:
In place constraint menu you can see the "Selection" 2 is active.Now select "X Axis"
as highlighted with green box.

-
Step 12:
Then click OK

-
Step 13:
In place constraint menu you can see the "Selection" 1 is active.Now select "Center
Point" as highlighted with green box.

-
Step 14:
In place constraint menu you can see the "Selection" 2 is active.Now select "Center
Point" as highlighted with green box.

-
Step 15:
Then click OK

-
Step 16:
Right click on XY Palne shown in side menu, and Turn on its "Visibility".

-
Step 17:
Again open the Place Constraint menu as shown in following figure and select "XY
Plane" as highlighted with green box.

-
Step 18:
Now Selection 2 of this menu "XY Plane: of Worm Gear as shown in following figure
with highlighted green box.

-
Step 19:
Click OK.

-
Step 20:
Next step is to constrain "Worm" with XY Plane of "Worm Gear". Now the tangential
constraint will be selected as shown in following figure.

-
Step 21:
Select "XZ Palne" of Worm as a 1st Selection.

-
Step 22:
Now select "XY Palne" as a 2nd Selection.

-
Step 23:
All Constraints are done.

-
Step 24:
Now Turn off "Visibility" of XY Plane that yoou have turend on in Step 16.

-
Step 25:
Collapse all the menus in side menu.

-
Step 26:
Now click the arrow as highlighted with green box, and select "Modeling View".

-
Step 27:
From Constraints menu, Right click on last constraint shown here, and select
"Drive Constraint".

-
Step 28:
Following display menu will appear. Now Enter start value as "0 degree" and end
value as "3600 degree" to get 10 revolutions of worm.

-
Step 29:
Now for advanced setting, click the << button and enter amount of value of
increment as highlighted.

-
Step 30:
Click Forward button as highlighted, and enjoy Animation or Dynamic Simulation of
Worm Drive. :-)

-
Step 31:
Here is the Animation.

-
Step 32:
Don't Forget to click "It Worked" here. :-)

