

IRONCAD Training 01-04 | Drag & Drop Modeling

Four videos that describes the Drag & Drop Modeling basics in IRONCAD.
-
Step 1: Drag & Drop Modeling (1/3)
https://player.vimeo.com/video/700611964?h=8221640858
All you need to do is to run IRONCAD and start a new 3D scene. In this video, you can focus at look and listen to what is being said and done. But it is always to your advantage to follow along and mimic what happens in the videos.
Then continue with the Next Tutorial in this our Beginner Training Course here on the IronCAD Academy. Don't look at the videos too long, but take short breaks with short intervals (pause the video, the voice will tell you to in the beginning) and then do in IRONCAD just like what you've seen in the video.
By following the tutorials and do the same things, you will learn IRONCAD step-by-step. Many questions that you have will be answered in the video and don't forget that you can rewind if you need to see where you should click, or hear what was being said, again.
NOTE: Use two screens, where IRONCAD is being run on one (try keeping it on the primary screen) and the video (this web browser) on the other screen.
Download the 3D files used in this course
Download 30 days trial of IRONCAD
-
Step 2: Drag & Drop Modeling (2/3)
https://player.vimeo.com/video/700612005?h=186995a78e
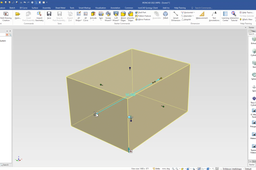
Note: Camera functions in the 3D scene -> use the middle mouse button (scroll wheel on the mouse) to rotate, hold down and move the cursor on the screen. The rotation center is always at the tip of the cursor arrow.
Combine with the [Shift] key to Pan or the [Ctrl] key to zoom. You can also zoom by rolling the scroll wheel
Download the 3D files used in this course
Download 30 days trial of IRONCAD
-
Step 3: Drag & Drop Modelling (3/3)
https://player.vimeo.com/video/700612030?h=a07ebcfc1f
Note: Remember to expand (+) the blue Part icon in the structure tree in the Scene Browser on the left side. It will show exactly how the Part is built up. The shapes under a Part are called features and can always be edited -> either by clicking on them or by the right click option Edit Feature Options.
An IntelliShape is a Feature with some extra functions or settings added to it,many which are unique to IRONCAD. More about this in coming Tutorials!
Download the 3D files used in this course
Download 30 days trial of IRONCAD
-
Step 4: Toy Car Exercise
https://player.vimeo.com/video/700612057?h=e0276e11ca
Note: Remember to expand (+) the blue Part icon in the structure tree in the Scene Browser on the left side. It will show exactly how the Part is built up. The shapes under aPart are called features and can always be edited -> either by clicking on them or by the right click option Edit Feature Options.
An IntelliShape is a Feature with some extra functions or settings added to it, many which are unique to IRONCAD. More about this in coming Tutorials!
Download the 3D files used in this course
Download 30 days trial of IRONCAD
