

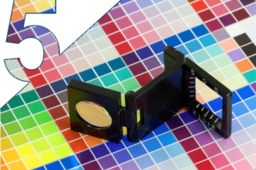
Part 5: Hard Proofing

Before embarking on large and color-critical prints, it is recommended to carry out proofing. Nothing beats the certainty of holding a sample part in your hand compared to relying on a screen visualization. The process of validating critical colors is called hard proofing and here is how it is done.
-
Step 1: Hard Proofing an Introduction
Sometimes colors that you see onscreen in GrabCAD Print dont match the colors on the printed part.
As we summarized in our first tutorial about color proofing, this is because 2D and 3D printers use the CMYK color space, while computer monitors use the RGB color space. Occasionally, colors may be mapped in a way that you are not satisfied with when the color is transfered from one color space to another.
If this occurs, you can manually proof these colors to identify the correct color to print. This is called hard proofing. This is the most accurate proofing option and involves iteratively 3D printing different colors until you produce one that matches the color you want.

Before we get started, the basic steps for this is to obtain the RGB value for the color you want to print. Then, take that value and print a sample of that color. If it does not match, begin iteratively hard proofing. This process can be accelerated and semi-automated by using a 3D color swatch generator (now also available on GrabCAD Print versions 1.40 and above).

-
Step 2: Take your RGB value
Take your original color’s RGB value. (If you do not have it, we explain a few ways to find it below,)
RGB is the most universal, commonly used color space in the industry, but you can also use Hex or Pantone as GrabCAD Print recognizes those as well. (If you have one of these color designations then you can move onto step 3)

Finding the RGB value if you do not have it
The process for finding the RGB value varies according to how much information you have to begin with. We will illustrate the process for different types of color input (color chip, RAL value, physical object, etc.) with the following common case.
Let’s say you want to create a prototype of a hand mixer, such as the one shown below, for which you need to match a series of specific colors. However, not all the colors have been specified with an RGB value. Instead, the color might be communicated to you in a number of ways from: using a plastic chip, a value from a different color system like RAL or CMYK, or even a physical object. If you are working with designers, they might provide you with a Color Material Finish document as shown below to explain the colors they want for the prototype.

You will need to convert the color systems provided to you into values that can be inputted into GrabCAD Print, such as Pantone, RGB, or Hex. (GrabCAD Print can match Pantone colors directly, so if you have the Pantone names, input those for your model.)
The procedure for finding out the RGB value depends on what form the color you are trying to recreate currently exists in. below we explain how to work with different color input types to find the RGB.
STANDARDIZED CHIP
If you have an official color chip from a different color authority like RAL, convert it to RGB using a free online converter.

Try printing a small plastic cube or chip to see if the color prints accurately.
For example:

If the color is not an accurate match, move onto step 3 of this tutorial.
PHYSICAL OBJECT
If you do not have an official color value or chip and all you have is the object itself, find its L.a.b color code by using a colorimeter. Then use an online converter to change the Lab value to RGB and move onto step 3 of this tutorial.

UNDEFINED COLOR
Sometimes you will receive a color via email from a designer or vendor without a color code. It may be a picture with a note saying "match this blue". In this case, you will want to ask the third party who provided the color for the specific value they require. If this is not possible, then you can use a color picker eyedrop tool that is available in many design software packages, such as Adobe Photoshop, to obtain the color value.

That covers a pretty wide range of scenarios that would require converting the color values. If your scenario is different and you are not sure how to proof your colors, feel free to contact us.

Once you have your color value, follow the rest of the tutorial: print a 3D swatch, find a match, and print more 3D swatches as needed. Adjusting the RGB value, or other settings for hue, saturation, and brightness.
-
Step 3: STEP 2: Generate a 3D color swatch
Use GrabCAD Print's color swatch tool to print a palette of your chosen RGB color with a range of different hue, brightness, and saturation settings applied. You can also adjust transparency to see the colors at varying opacity levels.


Or use this free online 3D swatch generator.
Here is a quick review on how to use the online 3D swatch generator tool:

Check out our full color 3D swatch generator tutorial here on GrabCAD Community or our Best Practices document in the Support Center for more detailed information about how to use this tool.
-
Step 4: Print the 3D swatch
Print the 3D swatch. If you used the online generator, you will need to import it as a model first.

-
Step 5: Use this color swatch to adjust the printed color
a) Try to find a match between your RGB value from Step 1 and one of the tiles on the 3D-printed swatch. Each tile has its own reference number. One tile will also list the hue, saturation, and brightness (HSB) settings and hex value for the color you selected.

This is helpful for tweaking colors and for obtaining the HEX values for the other colors by using the online swatch generator tool to view the list of all the colors on the swatch
a) If you found a match, take the color key from the generator web page and find the RGB or Hex value of that tile. If you did not find a match, see step 6.
b) Print a model with the RGB or Hex value.
Save this RGB or Hex value for future reference.
-
Step 6: Iterate using the 3D swatch generator (as required)
If the colors still do not match, go back to the 3D swatch generator and generate a new swatch with the closest matching color on the printed swatch or by slightly changing the HSB settings. Start with the closest matching color and keep playing around.
To sum up, the overall workflow looks like this:

Did this help? Have any questions? Let us know in the comments.
