

Some Tips for Dealing With Splines

A lot of new SOLIDWORKS users are creating a computer mouse based off of some videos on Youtube. This is great, welcome to SOLIDWORKS. I wish there were a Youtube to learn from when I started!
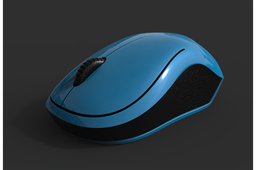
This is one example of the mouse, but there are dozens of others: Mouse
The tutorial is here: https://www.youtube.com/watch?v=HlTXEHjqWRI like many, it lacks audio.
I truly appreciate the time and effort that goes into tutorials, so this is not to bash or complain. Follow along with the video, and you will learn. I just want you to see that there are a few issues which can occur.
This problem arises around the five minute mark.
-
Step 1: Is a Fully Constrained Spline Good?

Here is the first spline you sketch. It consists of three control points, and it is pretty well constrained by the rectangular sketches made earlier.
Draw it now and follow along. We are just going to focus on this one spline. I added in the extra reference dimensions (39mm, and 99mm) so you don't even need the video to lay this out. But, if you are not familiar with adding dimensions to splines, then the video will help.
Why spend time on your splines? If you don't, your final part will likely have some undesirable lumps. Get your splines right, and the model will look better.
-
Step 2: Bumps = Bad

Here I changed the background to gray to improve the contrast.
I also turned on the option to Show Curvature of the spline.
The bump is not terrible... But, if you are trying to make a smooth part like a car or mouse, a bump like this can cause a lot of trouble for you later.
-
Step 3: Getting Smoother

How do you get rid of a bump?
Well, there are a few options. In the above example, I've managed to reduce the bump, but it is still there. What I did, was remove any of the spline constraints that were not needed (it sort of comes down to a best guess, but if you are the designer, maybe you NEED certain constraints more than others). Then you simply slowly drag the control handles until it "looks better".... Not very scientific, but it helps.
I know the SOLIDWORKS training beats into you head to "FULLY DEFINE YOUR SKETCHES". It is generally good advice, but constraining a spline is like herding cats. If you are going to constrain, then at least get the shape right, then add the dimensions at the end.

Option 2 is to question why we are using a three point spline. Here I have drawn a new two point spline. I left the old three point spline in the background for reference. The results are pretty good, but not ideal. I put in the orange arrows to show where I don't exactly match the original profile (not too critical). And were I fall outside the bounding sketches (worse).

This is what the curvature of the two point spline above looks like. It is nice, no bumps.
When making regular splines, use as few control points as possible.
-
Step 4: The Smoothest

Another tool you have access to are Style Splines. They share the same toolbar icon as a Spline, just press the little black triangle to see the Style Spline button.
Style splines have one job, and it is to remove bumps. I'm sure someone can comment on how they accomplish this, but I'm convinced it is some sort of magic.
Drawn above is a four point Style Spline. The two end points are attached to the end points of the original three point spline.
Like regular splines, use as few control points as possible. If I did not like the result from this four point spline. I'd add in a new control and try adjusting some more.
Adjusting Style Splines is really annoying. You'll get one side perfect. Then you'll get the other side perfect, only to find the first side has gone to Hell. Keep at it, the end result is worth it.

Style Spline curvature shown above.
Again, the goal is not an exact match to the original three point spline. Why would you want to exactly match a defective spline? The goal is to get it "really close" and not have bumps.
-
Step 5: Bonus Spline Tool
Another handy tool you might need at some point is "Fit Spline".
It is used to convert several pieces of geometry (like a mix of lines, arcs and splines) into a single Spline entity.
It is not really useful in this example, but try it out.
You'll need to add a toolbar button for it, I don't think it even exists in the menus for some odd reason.


I think next I'll watch the full mouse tutorial, build a mouse as I watch, then use the above methods to "fix" the mouse. I'll then compare the results.
Edit: Having gone through the full tutorial, I see that fully defining the splines is the only way that two people could expect to create the same model. Fully defining splines is great for the tutorial, but not practical (or useful) in a real-world application.
Being able to slightly tweak a spline is often required. Maybe once the design was finalized the splines would be locked down, but more likely, the individual parts would be saved off from the master model, with their references locked, or broken.
