

How can I get more appearances for Photoview?

This is a simple tutorial, any other questions please leave a comment.
-
Step 1:
Photoview 360 is a product of Luxology, Luxology's main product is "Modo", in modo you can add realistic grass and fur appearances, and because Photoview and modo have the same rendering engine, it can work for both, the only problem is that Photoview have not a realistic grass appearance.
In Photoview 2010 you can add appearances from modo to Photoview simply copying the files from one folder to another on windows explorer. This because SolidWorks main rendering engine was Photoworks and Photoview was a separate program (very similar to use as keyshots)
-
Step 2:
In SolidWorks 2011 Photoworks no longer exists and Photoview replaced it, but all appearances were mixed up, so what you see in SolidWorks are ".p2m" appearances from Photoworks (like the ones i'm sending you) and when you render your file, those .p2m appearances are linked to an equivalent library of appearances but with Luxology's extension ".lxp" something like this:

-
Step 3:
The way this appearances are linked cannot be changed directly, that's why you cannot add custom appearances to SolidWorks folders and you have to save them in different locations.
What you can change is the .lxp appearance, for example, in this case, i changed the name of grass .lxp appearance to "carpet color 5.lxp" (i don't use carpet appearances) and replaced the original file with this one (make a backup).
File locations are:
.lxp ---> C:\Program Files\SolidWorks Corp\SolidWorks\photoview\resrc\presets\materials
.p2m --> C:\Program Files\SolidWorks Corp\SolidWorks\data\graphics\Materials
So, you can put the file "carpet color 5.lxp" in
C:\Program Files\SolidWorks Corp\SolidWorks\photoview\resrc\presets\materials\fabric\carpet
and when you render something like this pumpkin you should see grass instead of an ugly carpet.
-
Step 4:
For the lights is just matter of adjusting the setting:

-
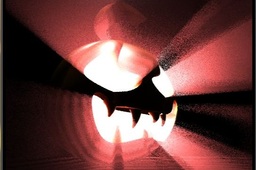
Step 5:
You just need to practice with fog settings, you could see that for this effect the light brightness is tiny in comparison with the fog radius (or fog distance), with a brighter light and the same fog, you get something like this:

