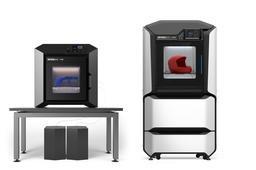
How to Print Remotely on the Stratasys F123 Series Using Wait For Part Mode

The new Stratasys® F123™ Series can print industrial-grade, reliable concept models, functional prototypes, jigs, and fixtures. In applications such as these, printer operators will often want to print parts quickly, remotely, and on-demand. That is why this series has a Wait for Part Mode, letting you send files straight to the printer to start building immediately, without needing to select the job manually from the Queue.
This tutorial will explain how to use this mode.
-
Step 1: Before getting started
- Once a printer is in “Wait for Part” mode, it will immediately start preparing to build once it receives a job file from Control Center or GrabCAD Print. You will need to first prepare the printer before activating this mode.
- To send a part to the printer via Control Center, the sender needs to be on the same network as the printer(s), either physically on site or connected via a Virtual Private Network (VPN). (An alternative is to setup a GrabCAD Print server on the same network as your printer(s) and send print jobs using GrabCAD Print.)
This tutorial will explain how to send prints from either alternative.
- Visit the help center for more information on setting up a GrabCAD Print server. In some organizations, if there is not an active job at the end of the day or week, the best practice is to prepare the printer and place it in “Wait for Part” mode in case an urgent part needs to be started outside of regular work hours.
Note: The GrabCAD Print server cannot be in read-only mode for remote printing to work.

In Control Center the status of the printer will be “Waiting for Part".

-
Step 2: Prepare the F123 Series printer for printing
1) Ensure a new build substrate is locked into place on the platen.
2) Check that there are model and support materials loaded to the printer with a sufficient amount to complete any job that might be sent remotely.
3) Navigate to the Tools page to select Settings; on the Settings Page select Wait for Part to place the printer into Wait For Part.

Note: The printer will remain on the “Wait for Part” screen until it receives and starts a job or the user exits using the back button.
4) The F123 printer is now in Wait for Part Mode.
-
Step 3: Print the part
Option 1: Send the Part using GrabCAD Print
1. If you have a GrabCAD Print Server running on the same network as your printer, proceed to step 2. If not, ensure that your computer is on the same network as the printers.
You may need to connect to your company’s network via a Virtual Private Network (VPN).

2. Open GrabCAD Print and select the printer that you prepared earlier. In the printer panel, the status of the printer will read “Wait for Part”.
3. Import the CMB, STL or CAD model(s) and configure your print settings.
Note: The material type should match the material type loaded to the printer.
4. Click print to slice, generate toolpaths, and send the job to the selected printer.
The Printer status will change to “Printing” once the file has been received by the printer.
5. You may monitor the print status via GrabCAD Print or the GrabCAD Print Mobile application.
Option 2: Send the part using Control Center
1. Ensure that your computer is on the same network as the printers. You may need to connect to your company’s network via a Virtual Private Network (VPN).
2. Open Control Center and select the F123 printer that you prepared earlier.
To access the control center, click on the File menu in GrabCAD Print and then select Export CMB. Follow the prompts to save the CMB and then open Control Center, click on the File menu and then select Insert CMB. A new dialogue box will open. Navigate to the location where you originally saved the CMB file and select it.


Note: In Control Center, verify that the status of the selected printer is “Waiting for Part.” The status can be found below the printer name on the “Pack” and “Queue” tabs.
3. Insert the CMB(s) and build the job. The material type of the CMB should match the material type loaded to the printer. Once the job is sent and received, the printer status will change to “Building.”
-
Step 4: Tools & supplies
Software
- GrabCAD Print version 1.3 and above
- Insight software (documented with Insight 13.0 and above)
Materials
These procedures are suitable for all F123 materials.

