

How to Process STL Files for 3D Printing Using Insight

This tutorial will give you a step-by-step procedure to aid in the generation of models. By following the steps of this tutorial, you can cut down on problems that can be easily overlooked.
The following tutorial is brought to you by Stratasys.
-
Step 1: Open STL file in the Insight Window. Choose Open from the File pull down menu
• Browse to the STL file you want to build.
• Click on and highlight the file name.
• Click Open. Your STL file will now appear in the Insight geometry window.
-
Step 2: Configure Modeler
The Configure Modeler window is used to choose the type of modeler, model and support materials, extrusion tip sizes, and slice height to be used for the current job. You will access this dialog by clicking on the icon that resembles your Fortus system on the right side of the main screen (or from the Modelers/Setup menu). You will only be able to choose options that are available for the modeler/material/tip size combination you have selected. (Figure 1)

Modeler: Select the type of modeler you will be using. Model Material: The type of material to build the part. Support Material: The type of material to build the disposable supports. Model Tip: The size of the model-material extrusion tip .Support Tip: The size of the support-material extrusion tip.Slice Height: The interval (layer thickness) at which to slice the STL model.
-
Step 3: Select Build Options
On the main Modeler Setup screen are options to determine different aspects of how the job will be built. These vary depending on which Modeler type is selected. (Figure 2)

Part Interior Style: Solid – Normal is the standard, solid build and Sparse will build the part with a hollow, honeycomb-type interior and a solid outer wall. Visible Surfaces: Selecting the Fine option will detect exposed surfaces in the file and use narrower toolpaths on those layers to improve the appearance of the model. Support Style: Sparse supports are used by default with WaterWorks support material (ABS, ABSi, and PC-ABS only), and can also be chosen with manual supports to reduce build time when building large parts without small features. Basic supports are the default with PC and PPSF materials to ease in manual support removal. Surround supports may be desirable to add stability to tall parts with a small base area. Build Mode: (Available only for Vantage S, Vantage SE, and Titan TI systems running ABS or PC material and a T16 tip / .010” slice configuration) Draft mode is the default setting and allows the Modeler to run at the maximum speed. Normal mode may be chosen to slightly reduce build speed and improve part quality.
-
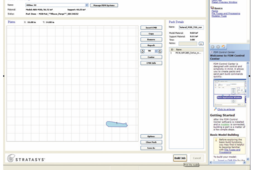
Step 4: Orient the STL Model (Figure 3)

Once an STL file is opened, you should check the orientation and scale before slicing. Proper orientation affects strength, build time and the appearance of the part. Depending on the shape, it might also make the difference between whether or not the part fits inside the modeling envelope. To reduce build time, orient the part so minimal supports are needed. To give the best appearance for the part, orient it so the slices are layered one on top of another along a vertical plane.
The STL model is displayed inside of the build envelope in the front-left corner. The displayed envelope represents the size of the largest model that can be built on the selected machine. If the STL is inside the display envelope, it can be built on the modeler.
You can access the STL Operations by clicking on the STL menu with your mouse. Available options include rotation, scaling, working units (inches or metric), and Orient by selected facet.
Orient by Selected Facet: This lets you select a facet of the STL model and a side of the modeling envelope to be aligned. First, select a side of the modeling envelope: Top, Bottom, Left, Right, Front, or Back. Then, click on the facet you want aligned with that side. The STL model is then oriented so that the selected facet will be parallel to and facing toward the specified side of the modeling envelope
-
Step 5: Slice the STL Model (Figure 3)

The simplest way to Slice an STL file is to click the Slice Icon on the main toolbar. The slice operation slices the part using the current values set in the slice operation panel. When the slicing operation is complete, it will notify you of any problems in the part curves.
The slice operation computes part curves by analyzing cross sections of the STL file. The slice operation begins at the bottom of the model and progresses sequentially to the top at a constant interval, or slice height. The value of slice height is based on the material and tip size used in your modeler. Stratasys recommends using the default values. However, you can reconfigure the modeler in the Configure Modeler window.
When the slice operation is complete, a message window will notify you of any problems in the part curves. It is especially important that all the part curves be closed curves (displayed in Red).
-
Step 6: Fix Problems detected during the Slice Operation
If the slicing operation does not detect any errors, you may move on to Step 7. If there are problems with the file (Open Curves will be displayed in Yellow), they must be fixed before going to the next step. Insight includes many curve editing functions to correct these problems, which are all covered in Stratasys’ Insight training course. You may also refer to the Help files for information, or you may prefer to make repairs to the STL file in your CAD or third-party software.
-
Step 7: Generate Supports (Figure 3)

To generate the supports, click on the Supports Icon in the main toolbar. The default supports generated by Insight will produce a successful build.
-
Step 8: Generate Toolpaths (Figure 3)

To generate the toolpaths, click on the Toolpath Icon in the main toolbar. This will generate the toolpaths for both the model and supports, based on the curve geometry and the specified parameters.
-
Step 9: Inspect Toolpaths
It is highly recommended that you visually examine the toolpaths on all layers of the part before sending it to the Modeler. Any problems (missing toolpaths, areas of the part that are too small to build, etc.) can be found and corrected at this time. Starting at the bottom layer, use either the Next button on the main toolbar or the Page Up key on your keyboard to step through the layers. Once a tool path problem is detected it can be corrected with a custom group. See the Insight help menu on how to use this feature.
-
Step 10: Send to the Pack and Download Window (Figure 3)

Once you are satisfied with how the part has been processed, clicking on the Build Icon will download the toolpaths to the Pack and Download window. Additional parts that have previously been processed can be added in the pack and download window by clicking on the “+” Icon located on the left side of the window. You may also create multiple copies and, on most modelers, rotate parts through this window.
Or:
Save part: Go to File>Save As>Job. This will allow you to process and save a number of parts before loading them to a system.
-
Step 11: Send CMB file to the Fortus system
Clicking on the Build Job button in the Pack window of FDM Control Center will send the CMB file to the modeler for building. (Figure 4) The job is now loaded to the systems Job Queue.

