

Realistic Packaging - Passion Tea Cup


Take your design from the screen to your hands. This Kinetic Vision Cup was printed in full color using Stratasys PolyJet technology.
Email me for starter files: colton.mehlhoff@stratasys.com
This whole tutorial is also in video form: https://youtube.com/playlist?list=PLrMTUKKtImfJezmgnuJ60TmxINqie73jO
If you are new to KeyShot: review the KeyShot Essentials playlist below
https://youtube.com/playlist?list=PL7j3sRRNC193lpsDsJt7DQHsDOVvkTS7m
Specifically:
-- Navigating the User Interface
-- Materials 101
-- Labels and Textures
And review the KeyShot to Print best practice
Best Practices for Working in KeyShot & GrabCAD Print
-
Step 1: Solid Bodies
On screen renders are often composed of open surfaces. This can be faster, but does not allow the model to be printed. Keep your design solid from the start to allow renders and prints to come from a single workflow. Don't worry. You can split surfaces to assign different materials to the same part. More on that later.
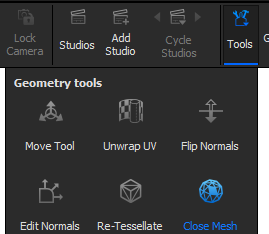
After importing models in KeyShot, check for solid bodies using the Close Mesh tool.
You can also check for solid bodies in GrabCAD. If your file imports as an assembly, disassemble it.

Then enter analysis mode.

Each disassembled part must have volume. In analysis mode, the back side of surfaces is colored purple to help see this.
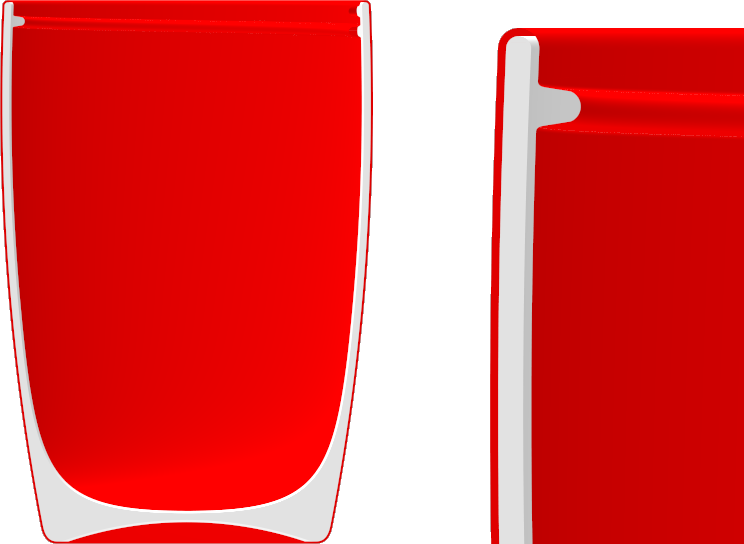
Here is the same cup designed as surfaces and as solid bodies.


-
Step 2: Overlapping Bodies
For this cup, the liquid should slightly overlap the cup. This is for two reasons.
1) The render works
2) There is no chance the tessellation will leave gaps between the model.
We could design with the overlap in our CAD software, or we can scale the liquid up in KeyShot. 0.1mm is plenty.

-
Step 3: Polishing Layer
Polishing layer: a layer of clear material added to the outside of a part
Designed to be sanded away, removing the support interface layer without removing color
Lowest priority in GCP (more on that later)
For this cup, we will be sanding the sides and bottom, so that is where we need the polishing layer. Shown below in Orange. The polishing layer here is 0.5mm thick.
For some models, a polishing layer can be added automatically in GrabCAD.
- Clear must be loaded
- Model must be printed in matte (better for post processing)
- The polishing layer must be applied to the entire assembly
The automatic polishing layer works great for this wine bottle.

-
Step 4: White Underprint
Cyan, Magenta and Yellow are semi-transparent. Opaque labels need white behind the color label to really 'pop'! This is not needed for labels which are only black (if black material is loaded) or white.
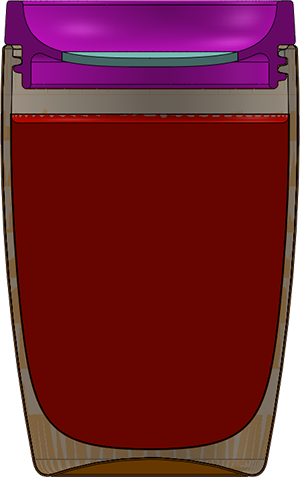
The designers of the Kinetic Vision cup specified where underprint should and should not be. Most importantly, there is a red circle on the bottom of the cup which needs to be red when looking from the front of the cup. White underprint would remove this effect.

This white label will be applied to a body offset inside of the cup.
Using UltraWhite and UltraBlack, the color layer is 0.5mm so we will have the white underprint 0.5mm inside of the part.
If UltraWhite is being used but not UltraBlack, the color layer is 1mm. (J55 with Clear)

Here is a visual of the underprint object in white and the cup in red. The threads were skipped on the underprint for simplicity since there will not be graphics on the threads.
This can be done automatically in GrabCAD if the underprint is needed on all graphics. The wine bottle is also a good example of this. We will use the automatic feature for the lid of the cup.

-
Step 5: Import in KeyShot
Now that all your bodies are properly prepared, you can import your assembly into KeyShot.
After importing:
- Check that each part is a solid body
- Name each part
- Check and repair normals on all parts
-
Step 6: Split Surfaces
Use the split surfaces tool in KeyShot to assign more than one material to a single part. For example, we want to apply a material with labels to the outside of the cup, but not to the inside of the cup. If you re new to the split surfaces tool, check out the video series which accompanies this tutorial.
We will need to split the cup, the white underprint, and the lid.

-
Step 7: Apply materials and labels
Apply the labels to each part. If you are new to KeyShot, check out the video series.
When applying materials, use Glass or Glass (Solid) for transparent areas.
In this exercise, we will be setting the liquid color in GrabCAD so that material is not important.
-
Step 8: Export
Check that all parts are showing which you want to print. (All of them for this exercise)
Export from KeyShot as a 3MF file. Use 600 or 900 DPI. Generally for 3D printing, we will export Preferring Textures although with this cup, it will not make a difference.

-
Step 9: Prepare in GrabCAD Print
In GrabCAD Print, select the printer you will be using (or a printer template). You can print this cup on a J850 (Prime), J826, or J55. It can also be printed in greyscale on some other PolyJet printers.
Choose the proper material sin the tray settings window. We will use white underprint for the lid so we will need the right materials for the 'optimize for packaging' feature. (Or, you could manually model the white underprint)

While in the tray settings, check the box for 'optimize for packaging'
The model may import with an error. Fix that in analysis.

Our model is currently assembled, but we want to print the cup separate from the lid. Select the two parts which make up the lid. Then right check and select "group".

We now have the lid separate and the cup assembly is hidden. Unhide (show) the cup, except for the lid.

Set the liquid color by selecting the liquid and opening model settings.
1) Select CMYK Input
2) Enter values (0, 5, 1, 0, 0, 94)
3) Click apply
4) Choose Body Appearance

Orient your model.
For the fastest print, lay the model on its back. This will make the model look great from the front. You could even print in gloss to skip post processing.
For the best part, bring at a 45 degree angle. Clear prints are most clear when views from the top of the print orientation. A 45 degree angle will mean the model is clear from the front and from the top. The below image shows this. Same concept applies for the J55.

Print!
-
Step 10: Polish the sides and bottom
Don't read this step, watch the video instead
1) Sand off the polishing layer using 100 or 120 grit sand paper. An air powered or electric tool is an option to speed up this process. Do not stay in one spot too long or the model will not be round.
Each layer of model and support are pushed into each other during printing.
This creates an interface layer of model and support.
It is thicker on the sides of the print than the top and bottom.
This must be removed to achieve a clear part.

2) Remove the sanding lines
Use 220 and then 400 grit sand paper with a tool or by hand
Then wet sand with 400, 600 and 800 grit sand paper. Wet sanding rinses away any accumulated debris.
3) Fill the sanding marks with clearcoat.
First, wipe the sanded areas with a degreaser and let dry.
A two part clearcoat is recommended like this one, but not required.
https://www.spraymax.com/en-us/products/product/clear-coats-and-spot-blender/2k-clear-glamour/
After spraying, let the part dry overnight. Its not worth touching it too soon and risk leaving a smudge.
4) You might stop here. The clearcoat will leave a texture on the part. Maybe that is ok, or maybe you continue to using polish. Here is a comparison of with and without polish.

5) Wet sand and buff
Wet sand by hand using 1000, 1500, 2000, and 2500 grit sandpaper.
Buff with a polishing compound. You can use an air powered tool if the geometry allows.
Here is a process and finished images. Some models don't need all these steps depending on what they are being used for.

-
Step 11: Finish the liquid
Using Super Glaze or an epoxy, you can make the liquid look like liquid. No sanding required!
