

Tutorial: Adding sub-assembly parts to an assembly parts list

Special Thanks to William for letting me use one of his assemblies for this Tutorial.
-
Step 1:
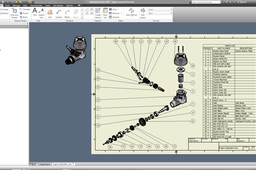
Open the drawing file in question.

-
Step 2:
Delete all existing parts lists and ballooning. Save your file.

-
Step 3:
Open the assembly for that was used to for the view you want the parts list based on. On the Assembly ribbon, Manage tab, select Bill of Materials.

-
Step 4:
For a structured parts, identifying the sub-assembly components, right click on the STRUCTURED tab, select Enable.

-
Step 5:
Right click on the structured tab again, select VIEW PROPERTIES.

-
Step 6:
Under the LEVEL select ALL LEVELS, and select the delimiter you wish, followed by OK. Repeat this and the previous 2 steps for every sub-assembly that you want to include in the parts list. Save all files.

-
Step 7:
Back in the drawing file, insert a parts list using the view you want to base it on, and place the parts list in your drawing. Be sure to select STRUCTURED. After the part list is created, Right click on the parts list, select EDIT PARTS LIST.

-
Step 8:
On the Edit Parts List window, click on the + to expand every sub assembly that you which to add to the parts list. Click OK.

-
Step 9:
Move the expanded parts list to appropriate position, and add ballooning as per normal.

-
Step 10:
For a basic parts list, without structure, right click on the PART ONLY tab, select ENABLE, repeat for all sub assemblies you want to include in the parts list. Save all files.

-
Step 11:
Back in the drawing file, insert a parts list using the view you want to base it on, and place the parts list in your drawing. Be sure to select PARTS ONLY.

-
Step 12:
Place the parts list, and add ballooning as per normal. All items should be included in the list.

