

35Tutorials'''' KeyShot tips(Step By Step)"''

How To Use Opacity Maps in KeyShot
-
Step 1:
..

-
Step 2:
...

-
Step 3:
...

-
Step 4:
...

-
Step 5:
...

-
Step 6:
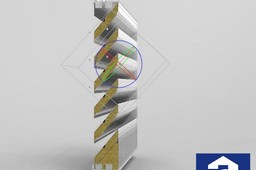
To make sure I could get the scale of the perforation right, I added a small reference piece of real perforated plate. Then, I just drop the “Aluminium circular mesh” material onto the turquoise parts. It’s found under Metal > Aluminium > Mesh.

-
Step 7:
You see… it’s a good thing I took the reference part! Selecting the material and going to the Textures tab, I select the Bump map and enable Sync. This way, any change I make to the bump map, will auto-synchronize with the opacity map. Now I changed the scale to 0.085.

-
Step 8:
As you can see, there is a difference between the two. However, which one do you prefer visually?

-
Step 9:
How about now? After adding the black fiber fabric material to the part behind it and zooming out, you can hardly tell the difference.
Now for the rest of the louvre, I chose chrome for the screws and a copy of the mesh material for all other visible parts. I did remove the bump map and the opacity map from the copy though, just to make sure both aluminium materials look the same.

-
Step 10:
Now for the detail shot settings. After zooming in and moving the frame part out of the way, we get to see the inside of the louvres.
In doing so, I noticed that the perforations of the louvres are almost oval-shaped. This is simply because the material uses a box map. I initially set everything up to be the same as the bottom insert, which is vertical. The other inserts are at an angle, so the projection of the perforation is wrong. This is simply solved. Just unlink the material from the vertical insert and edit the material to reorient the map.

-
Step 11:
....

-
Step 12:
...

-
Step 13:
...

