

Design Bolt in CATIA

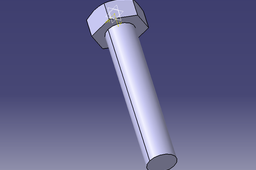
How to create bolt in CATIA
-
Step 1:
Choose the plane you want to work in(in this case I chose xy plane) enter the Sketch mode.
-
Step 2:
Draw a hexagon and make sure that dashed line coincides with horizontal or vertical axis.After that use Constraints (use dimensions that you need)

Note: In case If you need to constraint it like this It will show that this sketch is over constrained.So I deleted the circle in which the hexagon was inscribed and added the constraints I needed.

After that select these edges and axis,go to Constraints Defined in Dialog Box and select Symmetry

Repeat the same process on these edges too.

After that you should have a fully constrained sketch

Exit workbench
-
Step 3:
Use Pad

-
Step 4:
Select the plane in which you will add the body and enter the Sketch mode

Draw the circle in the center and constraint it

Exit workbench
-
Step 5:
Use Pad and enter the dimension you need

-
Step 6:
To chamfer the edges of the head,click on the plane where you can see two sides like this

After that use Project 3D Elements on this edge (or the edge on the other side of axis)

Use Line to draw something like this and constrain the angle

Also add Axis

Then you can exit workbench and use Groove

And this is the chamfered edge

-
Step 7:
To add the thread simply use Thread/Tap command
I used in this case Metric Thick Pitch M16 just to show how this works

