

Pre-Printing Tips for Rigid Opaque and Transparent PolyJet Materials

This tutorial gives you tips for how to use various rigid materials on Stratasys PolyJet printers. This includes the entire Vero family, as well as the VeroVivids, VeroFlex, VeroClear, and FullCure720 (also known as RGD720).
You can truly optimize final results for these materials if you know how to best utilize GrabCAD Print settings for part orientation, printing mode, surface finish, grid style, material selection, tray preparation, and other factors. Below, we will show you how.
The information in this tutorial is applicable to GrabCAD Print version 1.32 and above. Older versions may differ slightly.
-
Step 1: Introduction
A short reminder about each material’s main properties and purpose:
VERO FAMILY provides excellent dimensional stability, detail visualization and surface quality, as well as high reliability and a long shelf life. They are standard prototype materials/commonly used for prototypes.
VEROCLEAR (RGD810) is a colorless, transparent, rigid material featuring outstanding dimensional stability and visual simulation of transparent thermoplastics, such as PMMA. It is intended primarily for form-and-fit testing of see-through parts. They are meant to be printed in a matte finish and combined with flexible or colored materials for unique materials, opacities, hues, and hardness.
VEROVIVID materials bring improved design capabilities and superior color accuracy to the Stratasys J750™, J735™, and Connex3 systems with their wider color gamut and smoother color gradients. The new vivid magenta, yellow, and cyan materials are transparent, but you can achieve opacity by altering part design and print settings. The VeroVivids are good for advanced applications like quickly printing multi-color, multi-material, multi-texture prototypes.
VEROFLEX is specifically designed for the eyewear industry. It imitates eyewear’s look, feel, and function due to its specially blended materials, unique combination of stiffness and flexibility, and large range of colors and transparencies. All these characteristics make it the ideal material for designing and testing eyewear frames in a short amount of time. This material can be printed on the Stratasys J750™ and J735™.
-
Step 2: Part Orientation Tips
Snap fits: These should be oriented lying down. The part will be weakest along the layer lines so during printing, maximize the surface area (and minimize layer lines) for the parts of the model that will handle the most stress.

Thin walls: Parts with tall thin walls should be positioned standing up. The walls should be parallel with the X axis. This will minimize contact with the roller and maximize chances for successful printing and part accuracy.

Injection molds: Orient parts on the build tray so that material-flow into gates and large cavities will be parallel to the X axis. This will create smoother channels in the mold to optimize the injection process.

Holes: Print horizontally if possible. Holes positioned horizontally will come out more circular while ones printed vertically may come out slightly oval.

VeroClear:
- If printing multiple models with a glossy surface finish, arrange them so they have similar heights. This minimizes UV exposure and yellowish tint, and optimizes clarity.
- VeroClear parts turn yellow from prolonged UV exposure. Larger parts get more UV exposure, and therefore become more yellow. Keep large parts isolated on the tray, so that other parts nearby don't get unnecessary UV exposure.
In the tray below, the small parts positioned next to the large part would come out yellower than the small parts positioned far from the large part.

Alternatively, print the large part separately and in matte for less UV exposure.
VeroVivids and VeroClear:
- For a taillight application or similar, orient prismatic elements facing upwards and print with a glossy finish to reduce post processing.

-
Step 3: Printing Mode Tips
VeroFlex:
- Print parts using High Mix and High Quality printing modes. High Speed is not supported.
-
Step 4: Material Selection Tips
VeroClear:
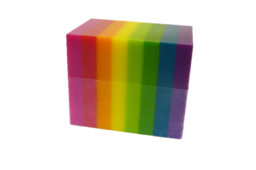
- It can be combined with all CMY materials to get transparent colors. The more VeroClear you add to the model, the more transparency you will get. But that will also mean less color. Below is a 3D color swatch with varying amounts of VeroClear mixed in to each tile.

- It can be combined with Agilus30 materials when required for overmolding or a rubber feel.
- Combined with rubber-like or colored materials, you can achieve models with unique material combinations, opacity, hue, and hardness.

VeroVivid:
- To print transparent parts, always select the pre-set digital materials (DMs). For a transparent vivid blue, select CM-003. For transparent vivid red, select MY-002, and so on.


- The base VeroVivid materials are transparent. Digital material colors that add other materials may affect the translucency of the part. The more opaque the material used in a digital material, the less translucency the part will have.
- Color profiles are selected automatically in GrabCAD Print.
- VeroVivid materials are recommended for textures.
- Pantone-colored parts can only be printed with VeroVivid materials.

VeroFlex:
- For VeroFlex, the color picker in GrabCAD Print appears when all five VeroFlex base colors are loaded in the material cabinet.
- Combinations of VeroFlex and other Vero materials are not supported. So, when printing with VeroFlex materials, make sure you load the material cabinet with VeroFlex materials only.
- When five VeroFlex base colors are loaded in the material cabinet (VeroFlex Cyan, VeroFlex Black, VeroFlex White, VeroFlex Magenta, and VeroFlex Yellow), the color picker in GrabCAD Print is available for use.
- Digital material combinations from two or three base VeroFlex materials are available.
-
Step 5: Surface Finish Tips
General recommendation: A matte surface finish is the easier option if you want a uniform finish across the entire part; GrabCAD Print automatically applies support material to all surfaces of the part when you select Matte, creating a uniform surface.
A glossy surface finish cannot achieve a fully uniform surface in one print, since some parts of the model will have support material applied. One way to get around this is to print models with a glossy finish in two halves, and assemble after printing. Another way is to print a model with no overhangs, and then after printing sand the bottom of the model where it came into contact with the tray.

A model with no overhangs to be sanded after printing

Featured above are two separate models glued together for a uniform surface finish.
Snap fits: a glossy finish is preferred as it creates stronger parts, and requires less support removal.
VeroClear:
- A matte surface finish is recommended to protect the part’s layers from excessive UV exposure during printing, thereby improving clarity.
- Print in a glossy finish when there are many prismatic elements or geometries that will be difficult to post process.
VeroVivids:
- A glossy finish is recommended when undercuts are insignificant, as it offers the best translucence in transparent parts.
- A matte finish is recommended for post process such as polishing and lacquering, as it is easier to polish.
- Glossy/matte surfaces can have slightly different hues.
-
Step 6: Tray Preparation Tips
VeroVivids:
In GrabCAD Print Version 1.32 and above, untextured mesh files and assemblies can be printed with VeroVivids as opaque or translucent. This is easily set using the Translucent option available in the Print Settings menu. Note that GrabCAD Print does not display the applied translucency. Opaque and transparent models will both appear as opaque on the tray.

In earlier versions of GrabCAD print, to print opaque parts using an STL file, use VeroPureWhite for the part’s color and add a coating layer of 0.3-3 mm from the vivid colors. If the STL file contains shells, you can make the internal shell white and the outer shell vivid.

-
Step 7: Additional Tips and Tricks
VeroClear:
- Parts that are less than 15-millimeters thick offer the best clarity and color. Parts thicker than 15 millimeters may have a tint.
- Traces of previous materials affect the clarity of VeroClear. Therefore, before every print job using VeroClear, run the material replacement wizard to clean the material tubes and print heads.
- Applying a coat of clear lacquer gives parts a shine and protects their surfaces, improving quality.
- Use clear glue to ensure clarity in joint areas. Apply glue only where necessary, minimize glued surfaces.
- Perform photobleaching to improve part transparency and remove yellow tint.
VeroVivids:
- VRML models printed using VeroVivids will have a white core applied and will therefore be opaque.
- VRML models with a clear texture printed using VeroVivids will have a clear core and, depending on the color selection, will vary in their level of transparency. We recommend trying a smaller print at first to sample the colors and ensure satisfaction before committing to large prints.
- Thicker parts result in more vivid, deeper colors.

Those are some basic tips to optimize the use of rigid materials in GrabCAD Print. If you have your own, feel free to share them in the comments.
